Step-by-Step Guide to Crafting DIY Cat Fish Toys Your Pet Will Love
DIY Cat Fish Toys and the Importance of Play
Cats are playful, curious, and active creatures, and providing them with engaging toys is essential for their physical and mental well-being. Among the many types of toys available for cats, fish-shaped toys have gained popularity due to their realistic appearance and ability to mimic prey, satisfying a cat’s natural hunting instincts. Not only do these toys encourage healthy exercise, but they also provide a fun and interactive experience for your pet. Crafting your own fish toys can be a rewarding project, offering both customization and cost-effectiveness compared to store-bought alternatives.
This guide aims to take pet owners through a comprehensive process of creating DIY cat fish toys, providing step-by-step instructions, materials needed, and creative tips to ensure that the toys are both safe and appealing to your feline friend. By the end of this guide, readers will be equipped with the knowledge and confidence to craft fish toys that will keep their cats entertained for hours.
Understanding the benefits of making DIY cat toys, particularly fish-shaped ones, is the first step toward embarking on this creative and enjoyable project. Not only do DIY toys allow pet owners to add a personal touch, but they can also be tailored to suit their cat’s specific preferences. Whether your cat enjoys pouncing, batting, or carrying their toys, making fish toys can be an exciting and highly rewarding experience.
The Appeal of Fish-Shaped Cat Toys
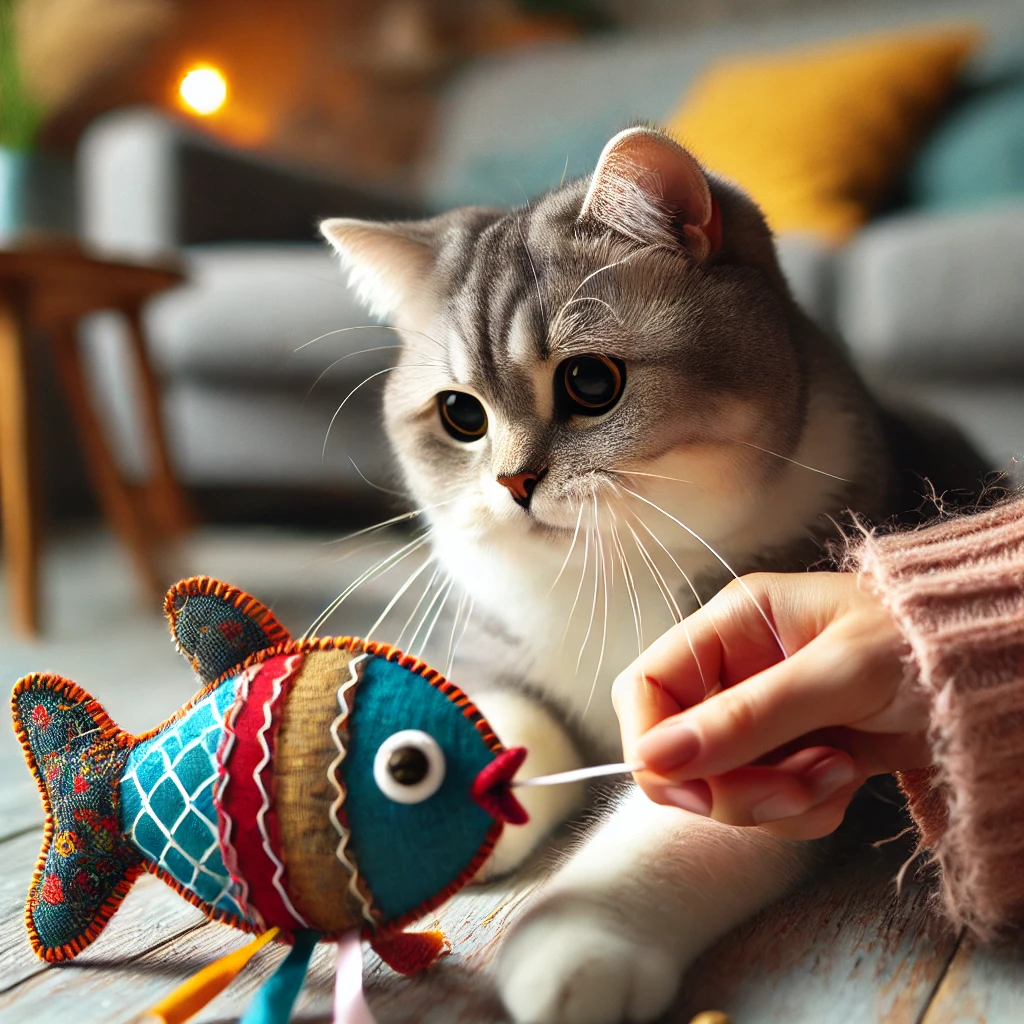
Fish-shaped toys hold a special appeal for cats due to their resemblance to real prey. Cats are natural hunters, and their predatory instincts are activated by objects that resemble fish, small rodents, or birds. This allows for mental stimulation as cats engage in simulated hunting behaviors. The motion and texture of a fish-shaped toy can capture a cat’s attention, making it an ideal choice for a DIY project.
Additionally, fish-shaped toys often provide tactile stimulation through various materials such as fabric, felt, or plush stuffing. The combination of these materials, along with the shape and size of the toy, creates an engaging experience for the cat. As cats bat at, chase, and pounce on the toy, they can burn off energy, improve their coordination, and have fun in the process.
Why DIY?
While store-bought cat toys are readily available, creating your own fish-shaped toys can offer several advantages. The first major benefit is cost. Materials for crafting DIY toys can often be found around the house, reducing the need for expensive purchases. Furthermore, DIY fish toys allow for customization. Pet owners can create toys that are just the right size for their cat, and even experiment with different colors, textures, and shapes to find what works best.
Another advantage of DIY crafting is safety. By choosing your materials and ensuring the toy is free of harmful chemicals or small parts that could be a choking hazard, you can create a safe environment for your pet. Some commercial toys may be made from materials that are not suitable for cats, such as toxic dyes or non-durable fabrics. With DIY toys, you have full control over what goes into the design.
Lastly, creating a toy for your cat can be a fun and rewarding experience. It allows pet owners to get creative, experiment with different techniques, and bond with their feline companions. Cats often appreciate the time and effort put into their toys, and they may respond positively to the personal touch that comes with a handcrafted item.
Selecting the Right Materials for Crafting Fish Toys
Before diving into the step-by-step process of creating DIY fish-shaped toys, it is important to understand which materials will work best. A few essential components for crafting fish toys include fabric, stuffing, sewing materials, and cat-safe accessories such as bells or catnip.
Fabric selection is crucial, as the material should be soft yet durable enough to withstand a cat’s claws and teeth. Felt and cotton fabric are common choices for crafting these toys. Felt is particularly suitable because it is easy to work with, can be cut into various shapes, and holds up well over time. Additionally, soft cotton fabric is gentle on a cat’s mouth and can be used for both the exterior and interior of the toy.
Stuffing is also important to give the toy a plush feel. Polyester stuffing is commonly used for this purpose, as it is lightweight, non-toxic, and provides a nice texture for cats to bite and carry. For added fun, consider filling the toy with catnip, which many cats find irresistible. The scent of catnip can encourage cats to engage with the toy more frequently, making playtime more enjoyable.
For those looking to add an extra element of excitement to the toy, consider attaching a small bell to the fish. The sound of the bell will further stimulate your cat’s instincts and encourage interactive play. However, it is essential to ensure that any bells or embellishments are securely fastened to avoid choking hazards.
Choosing the Right Size and Shape
Fish-shaped toys come in various sizes, so it is important to consider your cat’s size and preferences when deciding on the dimensions of the toy. Some cats prefer smaller, lightweight toys that they can bat around and carry in their mouths, while others may enjoy larger toys they can chase or pounce on. It’s a good idea to observe your cat’s behavior with their current toys to determine the ideal size for their fish-shaped toy.
In terms of shape, the design of the fish can be as simple or intricate as desired. A basic fish shape with a rounded body and a tail fin is often sufficient, but for those who enjoy more detailed crafting, additional features such as fins, eyes, and gills can be added. The key is to make the toy appealing to your cat while keeping it simple enough to create within a reasonable amount of time.
Gathering Materials and Preparing for Crafting
Before embarking on the crafting journey, gathering the right materials and ensuring you are prepared for the process is essential. Whether you are an experienced crafter or new to DIY projects, taking time to organize and plan ahead will make the process smoother and more enjoyable. In this section, we will cover the materials needed to create your DIY fish-shaped cat toys and provide guidance on how to prepare the crafting space. Additionally, we will offer tips on tools and techniques to ensure the toys are safe, durable, and visually appealing to your pet.
Selecting Fabric and Textiles for Your Fish Toy
The foundation of any DIY cat toy is the fabric or textile used for the outer layer. For a fish-shaped toy, you want to choose materials that are both safe for your cat and durable enough to withstand constant play. Several fabrics are ideal for crafting a fish toy, including felt, cotton, fleece, and linen. These fabrics are not only soft and comfortable for your pet but also robust enough to handle your cat’s claws and teeth.
Felt is a popular choice due to its ease of use. Felt is a stiff yet pliable material that holds its shape well, making it perfect for creating fish shapes. It is available in various colors, which is useful for personalizing the toy to suit your cat’s preferences. It is also easy to cut and sew, allowing for detailed designs like fins, scales, and tails.
Cotton fabric is another excellent option, particularly for those who want a lighter and more breathable material for their cat toy. Cotton is gentle on a cat’s teeth and mouth, making it a safe choice for interactive play. It is also easy to sew and can be found in a wide variety of colors and patterns. For an even softer feel, consider using cotton flannel or cotton jersey.
Fleece is a great material for making fish toys with a plush texture. It is soft and comfortable for your cat to hold in their mouth, and it has the added benefit of being warm and cozy. Additionally, fleece is durable, meaning your cat can enjoy hours of playtime without the toy losing its shape or texture.
Stuffing the Toy: Polyester Fill and Alternatives
Stuffing the fish toy is crucial to give it a soft, cushion-like feel and make it more engaging for your cat. Most DIY cat toys are stuffed with polyester fill, which is widely available and relatively inexpensive. Polyester fill is soft, lightweight, and non-toxic, making it an ideal choice for crafting cat toys. Additionally, it is machine washable, which is helpful for cleaning the toy after your cat has had some fun.
If you are looking for an alternative to polyester fill, there are other options to consider. For example, organic cotton fill is a natural alternative that provides a similar texture but without synthetic materials. It’s a great option for pet owners who prefer eco-friendly options. Some people also use fabric scraps or old clothes as stuffing, especially if they want to create a recycled, sustainable toy.
If you want to add some extra excitement to the toy, you might consider including catnip in the stuffing. Many cats find catnip irresistible, and it can encourage them to engage with the toy more actively. Simply sprinkle a small amount of dried catnip into the stuffing before sealing the toy. For cats that aren’t interested in catnip, consider using a small bell or crinkly material, which can stimulate your cat’s senses and make the toy even more engaging.
Adding Interactive Elements: Bells and Crinkle Materials
To make the DIY fish toy even more fun, consider adding interactive elements like bells, crinkle paper, or ribbons. These features can make the toy more appealing by adding sound or texture, which entices your cat to play and interact with the toy.
A small bell can be sewn onto the toy, either inside or on the tail, to produce a sound when the toy is moved or shaken. The sound of the bell captures a cat’s attention, encouraging them to bat at the toy and engage in play. Be sure that the bell is securely attached to prevent it from falling off during playtime. A tightly sewn knot should do the trick, but it’s always good to double-check the attachment for durability.
Crinkle paper is another interactive feature that many cats find fascinating. This material creates a rustling sound when touched, simulating the movement of prey and sparking your cat’s natural curiosity. Crinkle material can be tucked inside the toy’s body, or it can be used as a lining for the fins and tail to create more texture. The sound will entice your cat to pounce and play more actively.
Ribbons or fabric strips can be added to the toy’s tail to give it a more realistic and visually appealing design. When sewing ribbons onto the toy, ensure they are securely attached, as loose or dangling ribbons can pose a choking hazard. If you prefer a safer option, consider using fabric strips, which are less likely to unravel.
Essential Tools for Crafting the Fish Toy
Once the materials are selected, it is time to gather the necessary tools for crafting the toy. Fortunately, crafting a DIY cat fish toy does not require an extensive set of tools, making it an accessible project for everyone. The following tools are essential for making a fish-shaped cat toy:
- Needle and Thread – A sewing needle and durable thread are necessary for stitching the fabric pieces together. Choose thread that matches the color of your fabric to keep the seams neat. If you are working with thicker fabric like felt or fleece, make sure to use a heavier-duty thread to ensure durability.
- Scissors – A sharp pair of scissors is essential for cutting fabric with precision. You will need to cut the fabric into the shape of the fish and trim any extra edges or seams as you go. Make sure to use scissors that are specifically designed for fabric to avoid fraying or uneven cuts.
- Fabric Glue (Optional) – Fabric glue is a good alternative to sewing for those who prefer not to use a needle and thread. This can be used to bond the fabric pieces together securely, but it’s important to check that the glue is non-toxic and safe for your cat.
- Measuring Tape or Ruler – While precise measurements may not always be necessary, a measuring tape or ruler can help ensure that the fish toy is the right size for your cat. It is especially helpful for cutting the fabric to the correct dimensions before sewing or gluing.
- Pins or Clips – Using pins or fabric clips to hold the fabric in place while you sew or glue can help make the process more efficient and accurate. These tools are particularly useful when working with thicker fabrics or adding multiple layers to the toy.
Preparing the Crafting Space
Setting up a clean and organized crafting space is key to a successful project. Make sure you have a flat surface to work on, such as a table or desk, where you can comfortably cut, sew, and assemble the fish toy. Protect the surface with a cutting mat or old newspaper to avoid damaging it with scissors or glue.
Having all your materials and tools within reach will help streamline the crafting process. Organize your fabrics, threads, needles, and stuffing in designated areas, so you can easily grab what you need without having to search for it.
It’s also a good idea to set aside some time to focus on the project without interruptions. Crafting can be a relaxing and enjoyable experience, but it requires attention to detail, especially when working with small parts like bells or tiny stitches. Make sure you’re in a well-lit area, as it will help you cut and sew more precisely.
Step-by-Step Crafting Process for Your DIY Fish Toy
Now that you have gathered all the materials and prepared your crafting space, it’s time to dive into the step-by-step process of creating your very own fish-shaped cat toy. In this part, we will guide you through each stage, from cutting the fabric to stitching and stuffing the toy. Whether you are a beginner or an experienced crafter, following these steps will help ensure your DIY fish toy is safe, functional, and fun for your cat.
Cutting the Fabric
The first step in crafting your DIY fish toy is to cut the fabric into the appropriate shapes. Start by measuring and marking out the dimensions for your fish. You can create a basic fish shape or get creative by adding fins, tails, and other details. Depending on the size of the fish you want to make, use a measuring tape to ensure the pieces are proportional.
Using a pencil or fabric chalk, trace the fish shape onto your chosen fabric. For a simple fish, you’ll need two identical pieces of fabric that will form the front and back of the toy. If you want to add additional design elements, like fins or a tail, make sure to cut separate pieces for each part.
When cutting the fabric, ensure that the edges are neat and smooth. A sharp pair of fabric scissors will help prevent fraying and ensure precision. It’s important to leave a small seam allowance (usually around half an inch) around the edges to account for stitching. This extra fabric will be folded inside when you sew the toy together.
Sewing the Fish Body Together
Once the fabric pieces are cut, it’s time to sew them together. Take the two fish-shaped pieces and place them right sides together, so the side of the fabric you want visible is on the inside. This will allow the seams to be hidden once the toy is turned right side out.
Begin by threading your needle with a sturdy, non-toxic thread. You can choose a color that matches the fabric or a contrasting color for a more decorative effect. If you’re using a sewing machine, set it to a simple straight stitch.
Start sewing along the edges of the fish, leaving a small opening at one end of the body. This opening will be used later for turning the toy right side out and stuffing it. Use small, even stitches for a secure seam, and be sure to backstitch at the beginning and end to prevent the thread from coming loose.
If you’re hand-sewing, a whip stitch or running stitch will work best for this process. A whip stitch creates a secure, tight seam that is less likely to unravel. For extra strength, consider going over the stitches a second time.
Adding the Fins and Tail
If you want to make your fish-shaped cat toy more intricate, consider adding fins and a tail. This will not only enhance the appearance of the toy but also add texture, which may encourage your cat to interact with it more.
To create fins, cut small triangular pieces of fabric. These should be proportionate to the size of the fish and placed symmetrically along the sides of the toy. Position the fins on the fabric pieces before sewing them together, or sew them directly onto the toy body after it is assembled. For a more pronounced effect, you can stuff the fins with a small amount of polyester fill to give them more dimension.
The tail of the fish can be as simple or as detailed as you like. Cut out a fish-tail shape, and sew it onto the back end of the fish. Like the fins, you can choose to stuff the tail for added volume or leave it flat for a more subtle design.
Once the fins and tail are sewn onto the toy, proceed with sewing the rest of the body together as described earlier.
Stuffing the Toy
After the fish is sewn together and the fins and tail are attached, it’s time to stuff the toy. This is where the stuffing material, such as polyester fill, comes into play. Carefully turn the fish body right side out through the opening left for this purpose. Gently push the fabric into shape, making sure there are no wrinkles or creases.
Next, start stuffing the toy with the filling. Add the stuffing gradually, working your way through the body, fins, and tail to ensure an even distribution. Be careful not to overstuff, as this can cause the toy to lose its shape or become too hard. You want the fish to be firm enough to hold its shape but still soft enough for your cat to play with comfortably.
If you’ve decided to include catnip, sprinkle a small amount into the stuffing as you go. This will entice your cat and make the toy more appealing. If you’re adding a bell or crinkle material, be sure to position them securely within the stuffing, so they don’t shift or fall out during playtime.
Once you’ve added enough stuffing, pinch the opening closed and sew it shut. Use a strong, tight stitch to ensure the toy is securely sealed and no stuffing can escape.
Adding Interactive Features
Now that the fish toy is sewn and stuffed, it’s time to add the interactive features that will keep your cat engaged. Start by attaching a bell or small toy accessory, such as a piece of crinkly paper. Bells are often sewn onto the tail or the fin area of the toy. If you’re using a bell, make sure it’s securely attached, as cats can be quite curious and might try to remove it.
If you’re adding crinkle paper, carefully insert it into the tail or fins, ensuring that the paper is securely tucked inside. As your cat plays with the toy, the crinkling sound will provide extra stimulation, encouraging them to bat and pounce on the fish.
Some cat owners also choose to attach small fabric ribbons or a strip of contrasting fabric to the tail. This feature can enhance the toy’s playability by adding movement when your cat bats at it. However, make sure the ribbons are securely sewn to avoid any choking hazards.
Final Touches and Safety Considerations
Before you give the fish toy to your cat, it’s important to double-check the construction for safety. Make sure there are no loose threads, exposed seams, or small parts that could come off during play. Ensure that all the interactive features, like bells or crinkle paper, are securely fastened.
Test the durability of the toy by gently tugging on the fins, tail, and other parts to ensure they are attached firmly. If any parts feel loose, reinforce them with additional stitches or fabric glue.
It’s also important to ensure that the fabric is not too thin or prone to fraying, as this could create a choking hazard for your cat. If you’ve used any buttons or small attachments, check that they are sewn tightly and cannot be removed easily. Safety should always come first when crafting toys for your pets.
Maintaining and Enhancing the DIY Fish Toy for Your Cat
Now that you’ve crafted your DIY fish toy, the next step is to ensure it remains safe, clean, and durable for your feline friend. Cats can be rough on their toys, so taking proper care of the fish toy is essential to maintaining its longevity and ensuring your pet’s safety. In this final part of the guide, we’ll cover the best ways to maintain and clean your fish toy, along with ideas for enhancing and personalizing it for even more fun.
Cleaning and Maintaining the Fish Toy
Over time, your cat’s new toy will collect dirt, oils, and saliva, which can make it unhygienic or less appealing to your pet. To ensure your DIY fish toy stays clean and in good condition, follow these cleaning and maintenance tips.
Hand Washing and Spot Cleaning
For most fabric toys, hand washing is the gentlest and most effective way to keep them clean. Start by inspecting the fish toy for any damage or loose parts before cleaning it. If the toy is still in good condition, fill a small basin with warm water and a mild detergent. Gently scrub the toy with your hands or a soft cloth to remove dirt and oils. Be sure to pay attention to areas that may have accumulated saliva or other marks from your cat’s playtime.
If there are any crinkle materials or bells inside, take extra care to avoid getting them wet, as these components can be damaged. In these cases, focus on cleaning the fabric exterior and spot-cleaning the inner areas.
Machine Washing (When Applicable)
If the fabric used to make your fish toy is machine washable, you can place it in a laundry bag to protect it during washing. Choose a gentle cycle with mild detergent and cold water to prevent shrinking or damage. Avoid using fabric softeners or harsh chemicals, as these can irritate your cat’s skin or compromise the toy’s fabric integrity.
After washing, allow the toy to air dry. Avoid using a dryer, as the heat can cause the fabric to shrink or lose its shape. It’s important to thoroughly dry the toy before giving it back to your cat to prevent mold growth or unpleasant odors.
Inspecting the Toy for Wear and Tear
As your cat plays with the fish toy, it will inevitably undergo wear and tear. Regularly inspect the toy to ensure that no stitching has come undone or small parts have been detached. Check for any holes or fraying edges that might pose a risk to your cat. If any damage is found, repair it immediately by reinforcing seams or replacing any lost pieces. It’s best to catch small issues early before they become safety concerns.
Reinforcing Weak Areas
Certain areas of the toy, such as the tail, fins, or any parts where there is a bell or other attachment, are particularly susceptible to damage. If you notice that these areas are becoming weak or worn down, reinforce them with additional stitching or fabric. Using a stronger, durable thread can also help prevent future wear. If your cat has torn open the toy’s fabric, carefully sew up the hole and consider adding a few extra layers of fabric for added protection.
Enhancing the Fish Toy for Extra Fun
While the DIY fish toy is already fun and engaging, there are a few ways to enhance it and keep your cat’s attention over time. By adding different textures or features, you can ensure that the fish toy remains an exciting plaything for your feline companion.
Add More Catnip or Valerian Root
If your cat loves the fish toy because of the catnip, you can refresh the toy by adding more catnip or valerian root. Simply unstuff the toy slightly, add a pinch of dried catnip or valerian root, and reseal it. These aromatic herbs can provide your cat with an even more stimulating play experience. If you’ve never used valerian root before, it’s worth considering, as some cats find its scent even more enticing than catnip.
Create Interactive Elements
For cats who enjoy hunting and stalking, creating interactive elements can make the toy even more appealing. You can attach strings or ribbons to the tail or fins of the fish. These additions should be securely fastened to prevent them from coming off during play. Ribbons that dangle or sway will capture your cat’s attention and encourage them to bat, chase, and pounce on the toy.
Another idea is to add small rattles or squeakers to the fish. These noisemakers can stimulate your cat’s prey drive and increase their interest in the toy. As with any small attachment, make sure that these elements are firmly sewn in so they cannot be swallowed or removed.
Personalizing the Fish Toy
While your fish toy is already one of a kind, you can further personalize it to fit your cat’s personality. Some ideas for customization include:
- Adding Unique Patterns – If your cat has a favorite color, consider adding fabric in that shade to personalize the toy. You could also sew on fun patterns, such as polka dots, stripes, or floral designs, to make the fish look even more whimsical.
- Embroidery or Appliqué – For a more detailed design, try adding embroidery or appliqué to the toy. You could stitch a cute face on the fish or add additional features like gills or scales to make it more lifelike. This not only enhances the toy’s visual appeal but also provides additional texture that your cat may enjoy.
- Interactive Feathers or Fur – If your cat enjoys feather toys, you could attach small feathers to the body or tail of the fish. Be sure to use a secure method to fasten them, as loose feathers could be easily removed by your cat.
- Creating Multiple Fish Toys – Cats love variety, so consider crafting several fish toys of different sizes, colors, and textures. Having a collection of fish toys allows your cat to enjoy a rotating selection of toys, which keeps their playtime fresh and exciting. You can also make fish toys in varying degrees of complexity to match your cat’s activity level and preferences.
Safety Considerations for DIY Cat Toys
When crafting toys for your cat, safety should always be your top priority. While it’s tempting to make the toys as fun and interactive as possible, it’s important to ensure they are safe for your feline companion. Here are a few safety tips to keep in mind:
- Use Non-toxic Materials – Always choose fabrics, threads, and fillings that are non-toxic and safe for pets. Avoid any materials that could cause an allergic reaction or pose a choking hazard if ingested.
- Avoid Small, Detachable Parts – Ensure that all small parts, such as buttons or beads, are securely sewn on and cannot be easily removed by your cat. Small, loose parts can be a choking hazard or pose a risk of suffocation.
- Check for Durability – Regularly check the condition of the toy for signs of wear or damage. If the toy becomes too worn out or fragile, it’s time to replace it. Old or damaged toys could present a safety risk to your cat.
- Monitor Playtime – Always supervise your cat when they are playing with their fish toy, especially when it is new. This allows you to spot any potential safety concerns immediately and ensures your cat is enjoying their new toy safely.